Step-by-Step Guide to Creating a Community Portal Using NotionApps in 2025
A step-by-step guide to building a community portal app using NotionApps, designed for gyms, coaches, and membership-based communities.
Jan 14, 2026
Building a strong community often means more than just sharing content. Members need a place to follow structured plans, track their activity, stay engaged, and feel connected to the people guiding them. Traditional community platforms can be rigid, expensive, or overkill for small and growing groups.
With NotionApps, you can create flexible community portal apps powered by Notion databases, tailored to how your community actually works. These portals can be adapted for learning groups, coaching programs, creator communities, or membership-based platforms. One practical example of this is a gym or workout community portal, where members can access their plans, track activity, manage memberships, and stay motivated through shared success stories—all from a single, easy-to-use app.
Select the Notion databases you want to include and hit Build App.
For this project, the main screens we’ll be creating are:
Your Plan: A personalized view that outlines the user’s current plan, goals, and structured steps to follow.
Your Activity: A dedicated screen to track daily activities, progress, and completed actions over time.
Your Membership: A summary of membership details, including plan status, benefits, and subscription information.
Success Stories: A collection of real user experiences and testimonials that highlight results and build trust.
About Coach: An informational page introducing the coach, their background, expertise, and approach.
Step 2: Set App Identity in Settings
Open Settings in the app.
Rename the app, pick an icon, and update any other identity details.
A clear name & icon help your team recognize the app at a glance.
Step 3: Add Users
From the left sidebar, go to the Users section.
Click on Select User database and choose Members.
Login method - Email address + Login Code
Email address property - Email
Username property - Name
Turn the Allow users to sign up toggle on.
Click Confirm.
Step 4: Remove Old Screens
Go to Screens → Layout, and delete the default screens that were automatically generated from your selected databases. This lets you start fresh and create only the screens you actually need for your app.
Step 5: Build the Your Plans Screen
Create a new screen:
Click on New Screen → Select Plans Database → List (View Items) → Done
Name the Screen → Your Plans
Style Settings:
View Type → Grid
Image Fill → Fill
Grid Column Size → Large
Grid Image Style → Rectangle(Horizontal)
Data Settings:
Title → Title
Image → Photo
Sorting Property :
Sort By → Title
Order → (A-Z)
In-App Filtering :
Filter Column → Title
Filter Name → Title
Behaviour Settings:
Click on Go to Screen, this opens a new screen which allows users to View additional details about each workout.
Rename the Screen as Workout Details
Delete all existing Logics and add the following:
View Title → Heading
Expand the View Title box & chose Photo from the drop down for Image
View Activities → Text
View Link → Button (Button Title - Watch Video)
Step 6: Build the Your Activities Screen
Create a new screen:
Click on New Screen → Select Member Log Database → List (Update Items) → Done
Name the Screen → Your Activities
Style Settings:
View Type → Grid
Grid Column Size → Large
Data Settings:
Title → Workout Name
Caption → Date
Color Tag → Status
Sorting Property :
Sort By → Date
Order → (A-Z)
In-App Filtering : Add the following filter properties according to the Image:
Behaviour Settings:
Click on Go to Update Screen, this opens a new screen which allows users to View additional details about each workout.
Rename the Screen as Workout Details
Delete all existing Logics and add the following:
Update Workout Name → Multi-Select
Update Date → Date Picker
Update Completion % → Number Box
Update Status → Dropdown
Update Notes → Paragraph Box
Turn on the “Allow Delete” toggle and set button text → “Delete”
Change the save button text → Update
Step 7: Build the Your Membership Screen
Create a new screen:
Click on New Screen → Select Members Database → Details (View One Item) → Done
Name the Screen → Your Membership
Delete all existing Logics and add the following:
View Name → Heading
View Email → Contact Card
View Package Purchased → Text
View Purchased On → Text
View Expiry → Text
Step 7: Create the Success Stories Screen
Create a new screen:
Click on New Screen → Select Success Stories Database → List (View Item) → Done
Name the Screen → Success Stories
Style Settings:
View Type → Grid
Image Fill → Fill
Grid Column Size → Small
Grid Image Style → Rectangle(Horizontal)
Data Settings:
Title → Name
Caption → Ratings
Description → Category
Image → Photo
Behaviour Settings:
Turn on the Open Item On Click,Add New Item & Allow Search toggles on
Click on Go to Screen, this opens a new screen which allows users to read more about each testimonial.
Rename the Screen as Testimonials
Delete all existing Logics and add the following:
View Name → Heading
View Ratings → Text
View Feedback → Text
Step 8: Create the About Coach Screen
Create a new screen:
Click on New Screen → Select About Me Database → Details (View One Item) → Done
Name the Screen → About Coach
Delete all existing Logics and add the following:
View Name → Heading
Expand the dropdown and Select Photo for Image and change image style to Rectangle(Horizontal)
View Description → Text
View Book A Free Consultation → Button
View Email → Contact Card
View Address → Address Viewer
View Video → Video Viewer
Step 9: Update Navigation
Go to Edit Navigation and rename your tabs to match your app’s flow.
Update icons for a more intuitive interface.
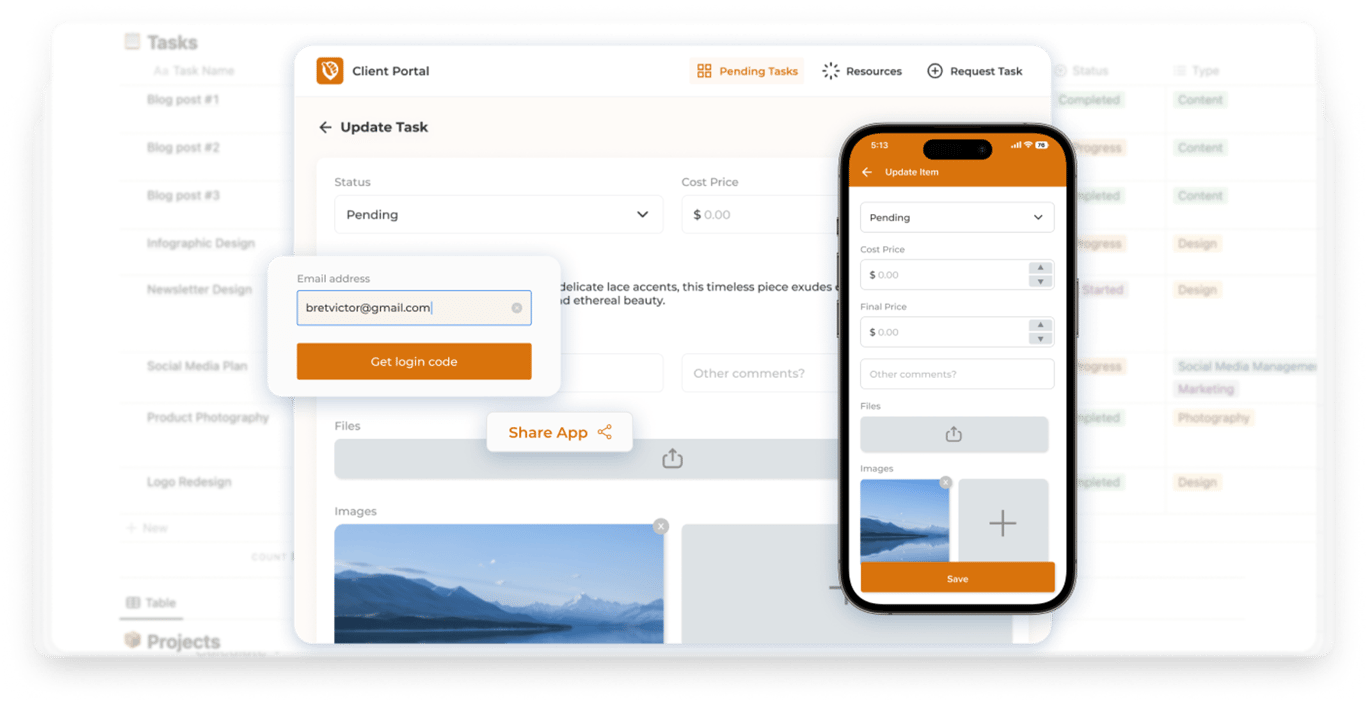
Step 10: Publish and Share Your App
Once you’ve finished setting up all screens, filters, and layouts, click the Publish button in the top-right corner of the NotionApps builder to make your app live. After publishing, you can use the Share icon right next to it to copy the app link and share it with users.
Conclusion: A Flexible Community Portal Built with NotionApps
Community portals don’t need to be complex to be effective. With NotionApps, you can turn simple Notion databases into a structured, easy-to-use app that brings plans, activity tracking, memberships, and community stories together in one place.
While this guide focused on a gym or workout community, the same approach works just as well for coaching programs, learning communities, creator memberships, or any group that needs a shared space to stay engaged and organized. The flexibility of NotionApps means you can start with a focused setup and expand it over time as your community grows.
Once published, the portal becomes a central hub that members can access across devices, helping you move beyond scattered tools and build a more connected, scalable community experience—all powered by Notion.
💡Pro Tip: NotionApps already offers a ready-to-use Community Portal template that you can customize to fit your needs, along with many other templates designed for different use cases. You can access all templates through this link🔗